English 

Views: 0 Author: Site Editor Publish Time: 2026-05-19 Origin: Site


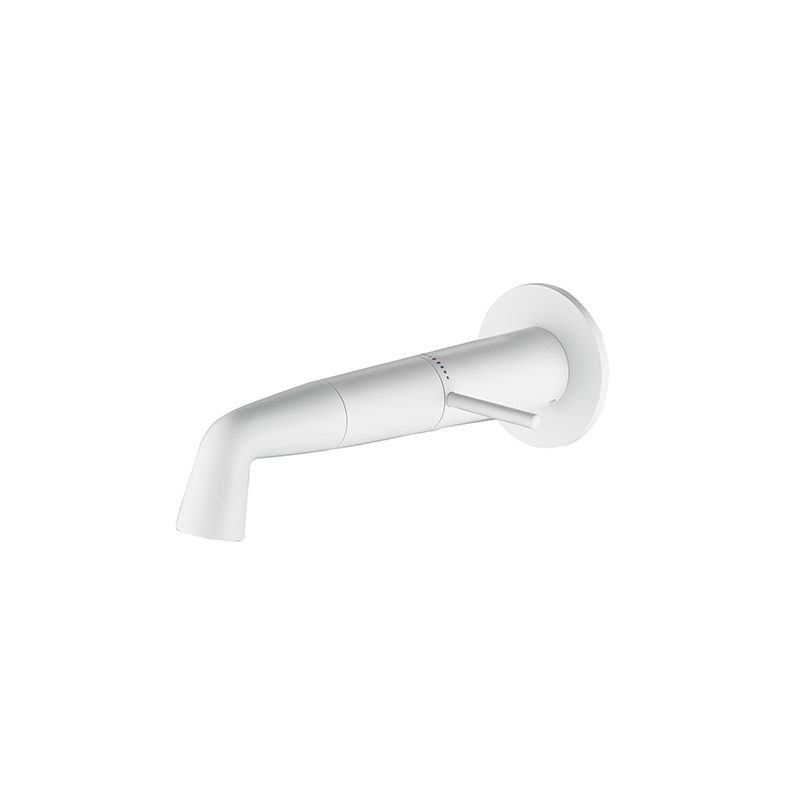
Small bathrooms, powder rooms, and accessible layouts pose a unique spatial challenge. You must maximize every square inch of available area. Designers must achieve this efficiency without compromising the overall aesthetics. Moving your plumbing directly to the wall offers an elegant solution. Installing a wall mount basin faucet clears the sink deck entirely. This approach visually expands the room. It also significantly simplifies your daily cleaning routines.
Still, you should approach this architectural upgrade realistically. The design looks undeniably sleek. However, it demands precise rough-in plumbing. You need strategic spatial planning and strict adherence to specific parameters. In this guide, we explore various fixture configurations and installation realities. You will learn exactly how to evaluate your space. We will help you navigate critical clearances for a flawless remodel.
Spatial Efficiency: Removing the faucet from the sink deck reclaims valuable counter space and enables minimalist, floating sink designs.
Implementation Reality: Wall-mounted configurations require opening the wall for plumbing; they are best suited for new builds or down-to-the-studs remodels rather than simple retrofits.
Critical Dimensions: The spout must sit exactly 4 to 6 inches above the sink rim, with the water stream hitting the center of the drain to prevent splashing.
Visual expansion remains the primary goal in small spaces. Completely clearing the sink deck reduces visual clutter. Tight powder rooms often feel cramped. By removing the fixture from the vanity, the room feels intentional and open. You instantly reclaim usable surface area. This space serves perfectly for soap dispensers or hand towels.
Accessibility and ADA compliance represent another major advantage. Pairing a wall mounted bathroom faucet with a floating sink provides necessary wheelchair knee clearance. Traditional vanities block this access completely. Wall installations allow for customizable height adjustments. You can mount the fixture at the exact ergonomic height required. The Americans with Disabilities Act highly recommends such unobstructed configurations for commercial and residential mobility.
Maintenance outcomes improve dramatically with this design choice. Traditional deck-mounted fixtures suffer from water pooling. Mineral buildup and grime accumulate at the base over time. A wall-mounted setup eliminates this hard-to-clean seam entirely. Water drops naturally fall away from the hardware. You spend significantly less time scrubbing hard water stains.
Choose a shallow basin to maximize floor space beneath the sink.
Mount the mirror slightly higher to accommodate the wall fixture seamlessly.
Use a single-handle mixer to minimize wall penetrations in extremely tight spaces.
Assuming existing walls have adequate depth for the concealed valve body.
Forgetting to plan for mirror placement around the plumbing penetrations.
Homeowners love the aesthetic versatility of wall-mounted hardware. You can adapt these fixtures to nearly any interior design style. The right combination elevates the entire bathroom experience. Thoughtful pairings create a cohesive, custom-built appearance.
You can utilize a concealed basin faucet to achieve a sleek look. Matte black or brushed nickel finishes work beautifully here. They create an uninterrupted wall plane. Minimalist designs rely on clean lines. A single-handle wall fixture complements a simple white ceramic vessel perfectly. It strips away all unnecessary ornamental details.
Small spaces benefit from strong architectural details. You can incorporate a widespread basin faucet featuring cross handles. Exposed pipe elements add raw character. Unlacquered brass finishes age gracefully over time. They develop a rich, dark patina. These vintage touches add profound architectural weight to tiny powder rooms.
Many designers prefer blending cold metals with natural elements. You might pair a sleek modern basin tap with a natural stone sink. Concrete wall-mounted basins also fit this trend perfectly. The cold hardware balances beautifully against warm, textured surfaces. This contrast brings life to the bathroom layout.
Floating sinks sacrifice under-counter storage. You must address this loss creatively to maintain the minimalist aesthetic. We recommend installing recessed medicine cabinets directly above the sink. Corner shelving units hold daily essentials without cluttering the floor. Floating wall cubbies provide excellent towel storage. These workarounds keep the vanity area spotless and organized.
Comparing installation methods helps you understand the required commitment. Traditional and wall-mounted setups differ drastically in footprint and complexity. You must evaluate these factors before finalizing your design.
Footprint and spatial yield heavily favor wall installations. Wall mounts free up one hundred percent of the counter depth. In contrast, traditional deck mounts require at least two to three inches of rear deck clearance. This difference proves critical in narrow powder rooms. Every inch dictates how comfortable the space feels.
Installation complexity represents a major divergence. A traditional bathroom sink faucet relies on simple, flexible supply lines. Homeowners can often connect these themselves. Wall mounts require rigid plumbing. Professionals must secure the pipes directly to the wall studs. You cannot easily adjust them later.
Long-term maintenance requires careful planning. Wall valves sit hidden behind drywall or tile. High-quality brass rough-in valves remain absolutely non-negotiable. Cheap valves may fail and cause internal wall leaks. Fixing such leaks requires tearing out expensive tile work. Always prioritize solid brass components behind the wall.
Feature | Wall-Mounted Faucet | Traditional Deck-Mounted Faucet |
|---|---|---|
Counter Space | Maximizes surface area completely. Leaves the deck bare. | Consumes 2-3 inches of rear deck space minimum. |
Installation Complexity | High. Requires opening the wall and securing pipes to studs. | Low. Uses simple flexible supply lines under the sink. |
Cleaning & Maintenance | Excellent. No base seam to collect grime or mineral deposits. | Moderate. Prone to water pooling around the fixture base. |
Best Application | New builds, major remodels, compact powder rooms. | Quick cosmetic updates, simple DIY retrofits. |
Precision dictates the success of this architectural upgrade. You must adhere to strict measurements. Guesswork leads to splashing, poor ergonomics, and costly rework. Careful planning ensures flawless functionality.
The 4-to-6 inch rule serves as the gold standard. Industry professionals dictate the spout should sit 4 to 6 inches above the sink's rim. This height ensures ergonomic hand-washing. It provides enough room to wash hands without excessive splashing. Installing it higher causes water to splash violently upon impact.
Spout reach and drain alignment require careful mathematical coordination. The chosen fixture must have a spout reach that drops water directly over the drain. Mismatched spout lengths cause major issues. The water might strike the sloping basin walls. This misalignment leads to water splashing onto the floor. You must factor in the finished wall thickness when calculating reach.
Wall thickness and stud placement dictate plumbing feasibility. Assessing existing wall framing remains your first step. A standard two-by-four wall usually supports the valve depth. Sometimes existing plumbing or shallow walls complicate matters. Plumbers might need to furr out the wall. Furring adds necessary thickness before you apply drywall and tile.
Measurement Point | Recommended Industry Standard | Why It Matters |
|---|---|---|
Spout Height | 4 to 6 inches above the sink rim | Balances ergonomic hand clearance with splash reduction. |
Water Drop Alignment | Directly over the center of the drain | Prevents water from hitting sloped basin sides and splashing out. |
Valve Depth (inside wall) | Check exact manufacturer specifications | Ensures the trim kit installs completely flush against the final tile. |
Calculating spout reach from the rough framing instead of the finished tile surface.
Failing to pressure-test the in-wall valve before sealing the drywall.
Ignoring the thickness of the stone backsplash when buying the spout trim.
Selecting the perfect hardware involves more than just aesthetics. You must evaluate functional compatibility and technical requirements. Making informed choices prevents costly delays during construction.
Valve and trim compatibility forms the foundation of your purchase. Ensure the selected fixture includes the exact rough-in valve required. Sometimes manufacturers sell them separately. Never purchase a trim kit without securing the matching in-wall valve. Different brands utilize proprietary valve designs. They are not interchangeable under any circumstances.
Handle configurations directly impact installation difficulty. Evaluate your preference between single-handle and two-handle widespread setups. A single-handle design requires only one wall penetration. It simplifies the plumbing process significantly. A two-handle widespread setup requires three separate wall penetrations. The plumber must align and level all three holes perfectly. Even a minor misalignment becomes visibly obvious once the tile goes up.
Budgeting for plumbing labor requires realistic expectations. Factor in the premium cost of an experienced professional plumber. They must route supply lines up the wall. They must firmly anchor a solid cross-brace between the wall studs. They must perfectly level the rough-in valve before anyone finishes the wall. This intensive labor significantly increases the initial project budget compared to a standard vanity installation.
Select the sink basin first. Its dimensions dictate the required faucet spout reach.
Review the manufacturer's technical specification sheet before buying any hardware.
Hand the physical rough-in valve to your plumber before wall framing begins.
A wall-mounted plumbing configuration serves as a stunning architectural upgrade. It effectively solves spatial constraints in compact bathrooms. It reclaims your counter space, simplifies your cleaning routine, and creates a sophisticated atmosphere. However, you can only achieve these benefits if your project allows for behind-the-wall plumbing modifications.
We highly recommend finalizing your sink selection first. The basin dictates the exact spout reach you need. Once you have those dimensions, consult a licensed plumber. They will verify your wall stud depth and confirm the rough-in feasibility. Only purchase the fixture after confirming these critical technical details.
Measure your available bathroom footprint to confirm a floating sink fits properly.
Identify whether your renovation involves opening the walls down to the studs.
Choose a sink style (undermount, vessel, or wall-hung) without pre-drilled holes.
Consult a contractor to assess existing wall depth and framing support.
A: Yes, they present a significantly higher installation difficulty than traditional deck-mounted models. The process requires running in-wall plumbing, securing a cross-brace between studs, and mounting the rough-in valve perfectly level. This is strictly a job for an experienced, licensed plumber, not a standard DIY weekend project.
A: Retrofitting requires tearing out the existing drywall or tile to reroute supply lines up the wall. You must then repair and refinish the surface completely. We primarily recommend this approach for full remodels or new construction, rather than quick cosmetic bathroom updates.
A: The industry guideline dictates installing the spout exactly 4 to 6 inches above the sink rim. You must calculate this measurement only after establishing the final height of the sink basin and the thickness of the finished floor.
A: They work beautifully with under-mount, vessel, and floating sinks. However, you must ensure the selected sink does not have pre-drilled faucet holes on its deck. Pre-drilled holes will be left awkwardly empty, ruining the minimalist aesthetic you want to achieve.


